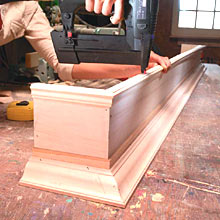
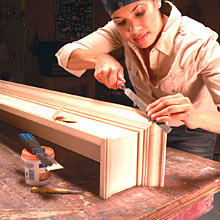
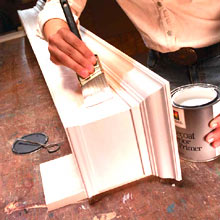
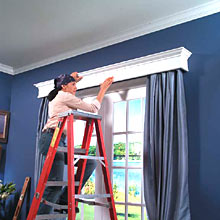
Window Cornices, cont.Selecting the woodIf you plan on painting your cornices, poplar and aspen are good choices for the box materials. They're stable and relatively cheap, and the grain won't show through paint. Pine and basswood moldings are usually the least expensive choices for paintable trim.If you want a stained or natural wood cornice, look for oak, mahogany, cherry, maple and others at home centers. The biggest problem is in finding hardwood moldings other than oak. You may have to special-order them or find a specialty millwork supplier by looking under "Millwork" in the Yellow Pages. Building mock-upsNot sure what style to choose? Here's a tip. Buy short lengths of different types of trim along with some cheap 1x4 and 1x6. Cut everything to 1-ft. lengths and mock up several different combinations. Just squirt a little wood glue on the pieces and clamp them together for about 10 minutes. Hold the mock-ups over the opening to get a feel for the final look. We actually made about 30 cornice samples before deciding on the final design for the how-to photos and the designs on this page. Of course, the hard part is choosing one of course. We'd love to see what you wound up doing. Feel free to send us photos of your cornices and let us know how the project went.ÑTravis A. Simple 1x6 box technique Tops that don't show from below can either lap over (upper photo) or butt against (lower photo) the top of the front board of the box. Further box depth adjustments can be made by using narrower or wider top boards or ripping it to a smaller width. B: Overlapping top with routed edge Overlapping tops simplify construction and are good to use when the top of the cornice will be seen from above. Use a router to carve a profile on the outer lip of the top before you assemble the cornice. "Stamped" moldings (upper photo) and "pierced" moldings (lower photo) offer another unique look and are widely available at home centers. C: Fabric wrapped Fabric-covered cornices can be built from 3/4-in. plywood since the wood is buried. If you'd like to wrap a cornice in wallpaper, build it from MDF (medium-density fiberboard) or poplar, and be sure to prime the wood before pasting on the paper.
|